
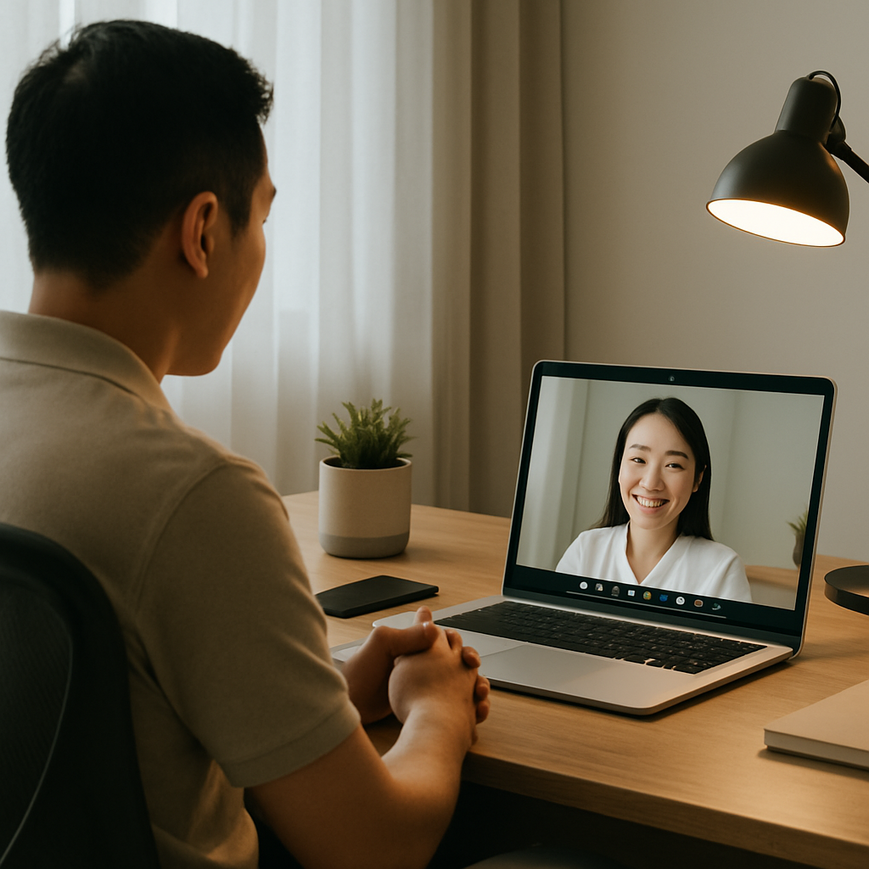
Clear video calls are no longer a nice extra for Singapore’s professionals, they are part of how business gets done. Whether you are meeting clients over Zoom, joining an internal Teams review, teaching a class, or presenting from a home office in a condominium, lighting has a direct effect on how clearly your face, expressions, and materials appear on screen. Good lighting helps others understand you faster, reduces visual strain for everyone on the call, and creates a more polished, trustworthy presence. Poor lighting, on the other hand, can make even a well-prepared speaker look flat, shadowed, or difficult to read.
For many people in Singapore, the challenge is practical. Homes are often compact, workspaces may share space with bedrooms or living rooms, and daylight can change quickly because of weather, high-rise orientation, and window glare. A room can be bright to the eye but still perform badly on camera because the light falls from the wrong direction or creates contrast that the webcam cannot handle. The good news is that better results do not require a studio budget. With a basic understanding of light direction, brightness balance, colour temperature, and camera exposure, you can improve clarity on Zoom and Teams in a way that feels natural and professional.
Why lighting matters so much on Zoom and Teams
Webcams are much less forgiving than the human eye. Your eyes adjust continuously to different light levels, but a camera sensor has a much narrower ability to capture detail in both bright and dark areas at the same time. That means a face can look fine in person but appear washed out on one side and dark on the other once it is on screen. Lighting affects not just appearance, but also how clearly your facial cues are read, which matters in negotiations, interviews, training, and leadership communication.
In video calls, clarity depends on three things: how well the camera can distinguish your face from the background, whether the light is even enough to show features without harsh shadows, and whether the colour of the light makes skin tones look natural. When the lighting is poor, software may raise the image brightness automatically, but that often increases noise, grain, or blur. Better light allows the camera to work less hard, which usually produces a cleaner image.
Camera exposure and contrast in plain language
Exposure is how much light reaches the camera sensor. If exposure is too low, the image looks dark. If it is too high, bright areas lose detail and appear white or blown out. Contrast is the difference between the lightest and darkest parts of the frame. On video calls, very high contrast is a common problem when a bright window is behind you or when one desk lamp lights only one side of the face. The camera may expose for the background or for your face, but rarely both perfectly without some adjustment.
A practical target is a balanced image where your face is clearly visible, the background is not distracting, and there are no extreme shadows cutting across your eyes or cheeks. This is more important than simply making the room brighter.
The best lighting setup for a clean, natural image
A reliable setup usually starts with soft front lighting, supported by some fill light from the side if needed. Front lighting means the light source is generally in front of you, slightly above eye level, so your face is illuminated evenly. This does not mean staring directly into a lamp. It means placing a light source so it helps your features show without creating glare or sharp shadows.
Many people in Singapore rely on overhead room lights alone, but overhead lighting often casts shadows under the eyes and nose, which can make the face look tired or uneven. If you use only a ceiling light, try adding a desk lamp, ring light, or soft light source in front of you to reduce the shadowing. When possible, diffuse the light by bouncing it off a wall or using a lampshade or diffuser, because soft light tends to look more flattering and more natural on camera.
Use front-facing light, not backlighting
Backlighting happens when the brightest light is behind you, such as a window, balcony door, or strong room lamp placed behind the chair. This is one of the most common causes of dark faces on calls. The camera sees the bright background and reduces exposure, which makes your face appear underlit. If your desk is near a window, turn your setup so that the window is in front of you or to one side, not directly behind.
If you cannot avoid a bright background, close blinds or curtains, or add a front light to compensate. In many Singapore homes, this is especially useful in rooms facing strong afternoon sun. Even a thin curtain can help reduce harsh daylight and make the camera image much more stable.
Choose soft, even light over harsh spot light
Hard light, such as a bare bulb or uncovered direct lamp, creates sharp shadows and strong highlights. On video, that can exaggerate texture, shine, or unevenness on the skin. Soft light spreads more evenly, which generally improves facial clarity. A simple way to soften light is to place it behind a diffuser, such as frosted plastic designed for lighting, or to bounce it off a pale wall. Even a small change in angle can reduce glare on glasses and shine on the forehead.
If you wear spectacles, monitor where reflections appear. Light placed too high or too far to the side may reflect off the lenses and obscure the eyes. Adjust the lamp height, the angle of the screen, or the seat position until the glare is minimised.
Natural light in Singapore, how to use it well
Natural daylight is often the easiest and most flattering source of light if it is controlled properly. Singapore receives strong daylight throughout the year, but the quality and direction of that light can change across the day. Morning light is usually softer, while late afternoon sun can be harsh and uneven. Bright tropical light can also produce a high-contrast image if a window is directly behind or beside you.
To use daylight effectively, position your desk so the window is in front of you or at a slight angle. This helps illuminate your face naturally and avoids the silhouette effect that occurs with backlighting. If the sun is too strong, use sheer curtains or blinds to diffuse it. The goal is not to block all daylight, but to make it gentler and more consistent.
Working around Singapore’s weather and high-rise glare
Because weather changes can be rapid, daylight can shift during the same meeting. Cloud cover, passing rain, and reflected sunlight from nearby buildings can all alter the brightness in your room. If your calls are important and happen at fixed times, observe how your room looks on camera at different times of day before deciding where to place your workstation. Sometimes moving the desk by even one metre can change the image substantially.
High-rise living can also create glare from neighbouring facades, especially in the late afternoon. If your room faces strong reflected sunlight, use a curtain, reposition the desk, or rely more on artificial front lighting. For people who take frequent calls from home, the best long-term solution is often a hybrid setup, daylight when it is gentle, supported by a consistent artificial light source for reliability.
How to choose and position artificial lighting
Artificial light gives you control, which is valuable when schedules are full and weather is unpredictable. A simple desk lamp, a LED panel, or a ring light can all improve clarity if used thoughtfully. The key is not the device itself, but how it is placed and what kind of light it produces. For video calls, light that is too warm or too cool can make skin tones look unnatural, so selecting the right colour temperature matters.
Colour temperature and why it affects skin tone
Colour temperature describes the warmth or coolness of a light source, measured in Kelvin. Lower Kelvin values appear warmer, more yellow or orange. Higher values appear cooler, more blue-white. Many video call setups work well with neutral white light because it tends to look clean without making the face appear overly warm or clinical. A very warm bulb can make the image look dim or orange, while a very cool light can make the skin appear pale or harsh.
As a general approach, try to keep all the lights in the room similar in colour temperature. Mixing a warm table lamp with cool ceiling lighting often creates uneven colour on camera. If you use only one light source, make sure it is bright enough and placed well rather than relying on multiple mismatched lights.
Placement and height matter as much as brightness
Place the main light slightly above eye level and slightly off-centre, not straight below the face. Light from below can create unnatural shadows that are distracting on video. Light that is too high can deepen the eye sockets and make the face look tired. A good starting point is to put the light about 30 to 45 degrees from the front of your face and adjust from there.
If you need more depth, add a second, softer light on the opposite side to reduce shadow. This is often called fill light, meaning a light that fills in shadows rather than becoming the main source. In smaller Singapore apartments, even a plain white wall can help if you bounce light off it. The result is often more flattering than a bright lamp pointed straight at your face.
Set up your Zoom and Teams environment for clarity
Lighting does not work alone. Your background, screen brightness, camera angle, and seating position all affect how the final image appears. If your screen is very bright, it can make your face look darker by comparison. If your camera is too low, it may emphasize the chin and reduce eye contact. A stable setup gives better results than constant on-the-fly adjustments.
Use a camera position roughly at eye level so that you appear naturally aligned with the viewer. Sit at a comfortable distance so your face fills enough of the frame to be recognisable without cropping too tightly. Keep the background simple and uncluttered, especially if you are using a virtual meeting for client-facing work. A plain wall, bookshelf, or neat corner is usually more effective than a busy room because the eye stays on your face and the content of the meeting.
Simple checks before joining a call
- Look at your camera preview before the meeting starts.
- Check for strong shadows under the eyes, nose, or jawline.
- Stand or sit so no bright window is directly behind you.
- Confirm that your face is brighter than the background.
- Reduce screen glare on glasses by adjusting light angle or monitor brightness.
- Make sure the room light is stable and not flickering on camera.
These small checks are especially useful when moving between office, home, and co-working spaces in Singapore. A setup that works in one room may not work in another, so it helps to test once and save the preferred arrangement when possible.
Common mistakes that reduce clarity on camera
One common mistake is placing the brightest source behind the monitor and assuming it will help. In practice, that often creates a bright halo in the background and a dark face in the foreground. Another frequent issue is relying only on overhead lighting, which can make eyes look sunken. Some people also use very intense ring lights without diffusing them, which can create a flat look, specular reflections, or discomfort during long calls.
Another mistake is ignoring the room’s colour balance. A room with a strong yellow ceiling light, a blue daylight window, and a white screen can produce mixed tones that the camera struggles to interpret. Simplifying the light sources often improves the image more than increasing brightness. It is also unhelpful to sit too close to a wall behind you, because the light may flatten the scene and remove depth. A small gap between your chair and the background usually gives a more balanced result.
Practical lighting habits for Singapore work and home life
For many Singaporeans, one room does multiple jobs, so the aim should be adaptability. If you regularly join morning calls, use the softer morning daylight when possible. For afternoon meetings, be prepared for stronger sun and more glare, especially if your window faces west. If your schedule shifts between office and home, keep one portable light source that can be moved easily. A compact LED lamp with adjustable brightness can be a practical option for a home workstation or temporary desk.
If you are presenting to clients, teaching, or leading large Teams meetings, think of lighting as part of your communication, not just a technical detail. Clear lighting helps people focus on your message and can make the entire interaction feel more polished. For hybrid productions, webinars, or professional livestreams, a more deliberate lighting setup may be worthwhile, especially when the image is part of the brand impression. For everyday business calls, small adjustments are usually enough to create a noticeable improvement.
When the setup affects important work, such as client pitches, media interviews, training sessions, or executive communications, it may help to consult a professional event or video production team for a more consistent on-camera environment. That is especially relevant for organisations that want dependable visual quality across multiple speakers and locations.
Better lighting on Zoom and Teams does not require complicated equipment. It requires control, consistency, and a basic understanding of how cameras see light differently from the human eye. Start with light in front of you, soften harsh sources, avoid bright windows behind you, and keep your room lighting consistent. For Singapore homes and offices, that usually means adapting to daylight, reducing glare, and choosing a setup that remains reliable through changing weather and tight spaces. Once your lighting is balanced, your face becomes easier to read, your expression looks more natural, and your communication feels more professional.
If you want one simple rule to remember, make sure the camera sees your face first, not the lamp, the window, or the shadows. That single adjustment often makes the biggest difference.

Jeremy Lee is a seasoned digital marketing director and strategist with over two decades of experience in the industry. As the founder of Sotavento Medios, I manage a diverse portfolio of over 50 businesses, helping brands grow through advanced search strategies and digital innovation. My work focuses on bridging the gap between traditional search engine optimisation and the evolving world of AI-driven answer engines.
get in touch